6. Editing components
Intro
In this guide we’ll look at the Custom type “Settings”. This custom type allows you to define settings for your application or website. Like pre-set fixed links to global pages like “products”.
Settings (standard urls)
1. Inside the “Settings” Custom Type, is a field called “Links” where you can add fixed links that point to specific content.By using fixed links in the “Links” field of the “Settings” Custom Type, you can make sure that the links remain correct. This helps maintain the accuracy of links in your application, so you don’t have to worry about broken links or manually updating all the links when content changes.
2. Click on the Type button.
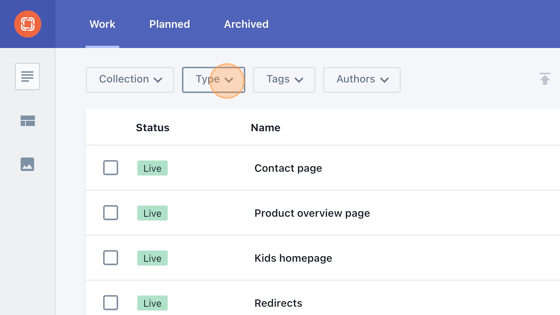
3. Click the “Search type” field.
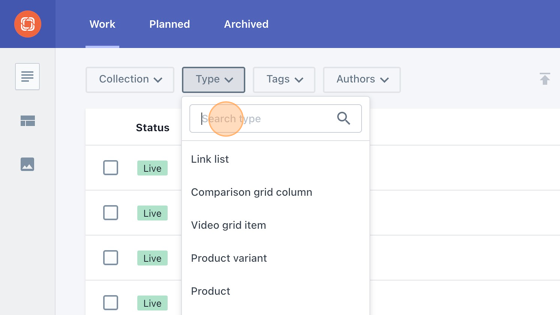
4. Type in “settings” or manually scroll down to find it in the list and click on it.
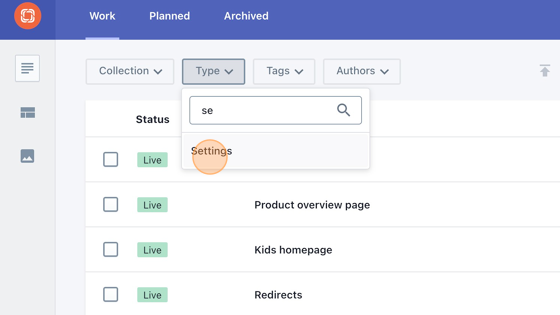
5. Click on “Settings” of type “Settings”.

6. Click “Links”

7. Click on a link that you want to change. For instance “Product overview page”

8. Click “Link to a Document…”

9. Click “Link to a Document…”

10. Click “Type” to remove the current type “Product overview page” to be able to search for all the documents.

11. Click the “Type” field

12. You can start typing to search for a specific type of document. Then select the type. You will get all the documents of this type.

13. Or click the “Search…” field and type in to search for a specific document.

14. You can also scroll down through the documents and select one.

15. Click this cross icon to delete a link.

Header
16. In this guide, we’ll be editing the header of the website. In the header you can insert “Mega Menu Items”, for a documentation on how to edit these, please see the mega menu items guide.
17. Click on “Collection”, since the header is a collection of components.
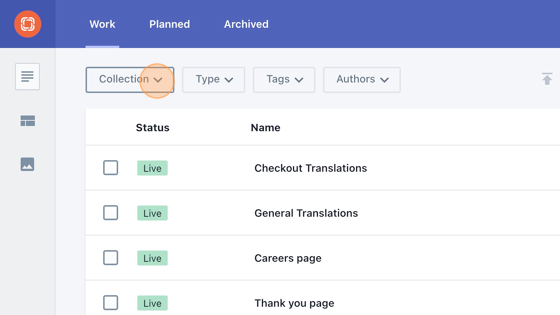
18. Scroll through the dropdown and click “Header”

19. Click “Header - Adults” or “Header - Kids” of type Header (depending on which of the two you want to edit, but both share the same workflow).

20. Click on the text of “Announcement” to change the text that is displayed all the on the top of the header.

21. Click on the “Link text” to change the title of the menu item that is being displayed.

22. When a user clicks on a title of the menu, a dropdown component of in this case different toothbrushes and accessories appears. This component is of type Mega Menu Item. Click “All brushes and accessories - Adults” to change to a different Mega Menu Item.

23. The dropdown component of type Mega menu item “All brushes and accessories - Adults” is currently used.

24. Click “Select another document” to change it to a different mega menu item.

25. Scroll down the documents to select the desired Mega Menu Item.

26. If you want to change the order of the existing mega menu items, click this icon and drag it to the desired position.

27. You can also add a redirect link to the Header, instead of a Mega menu item. When users click on this, they won’t get a dropdown like above, but they’ll be redirect to a different url. Whether that’s within the website or outside. To do this you have to click on the Link.

28. Fill in the desired link you want to redirect to if it’s outside of the Playbrush website.
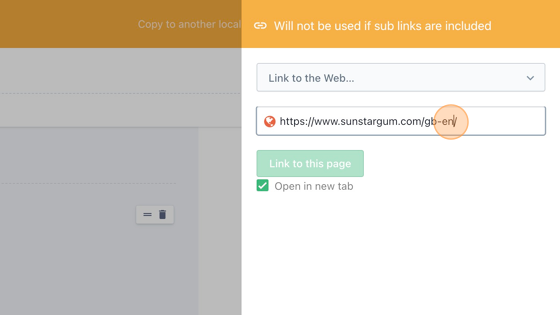
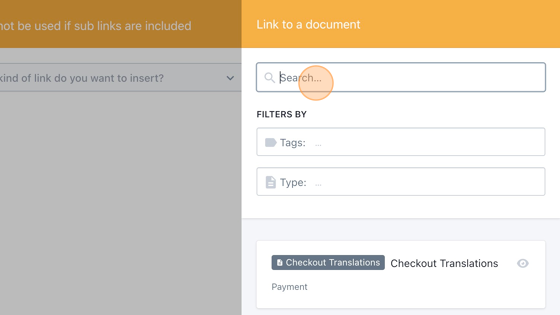
29. Click “Link to a Document…” if instead you want to redirect the user to a part on the website of Playbrush.

30. Click the “Search…” field to search for a part on the website you want to redirect the user to or scroll down to the desired document and click on it.
31. Click the “Link text” field to change the text that is displayed in the header on which users can click to be redirected.

32. Click “Add a new element in Menu items if you want to add a new element to the header.

33. Click on the garbage icon to delete an element from the header.

Footer
34. In this guide we’ll be editing the footer of the website. In the footer you can insert “Footer Link Lists”, for a documentation on how to edit these, please see the footer link lists guide.
35. Click on “Collection”, since the footer is a collection of components.

36. Scroll through the dropdown and click “Footer”

37. Click on the footer with type Footer.

38. Top part of the footer.
39. In this part you can edit the icons and titles that are on the top of the footer. You can click on the icon to change the icon.

40. Click on the title to change the text of the title.

41. If you want to change the order of the existing icons, click this icon and drag it to the desired position.

42. If you want to add a new icon, click on the button “Add a new element in icons”.

43. If you want to delete an icon, click on the garbage icon.

44. Bottom part of the footer
45. In this part you can edit the social media icons that are on the bottom of the footer. Click on the dropdown of the social icon to change its icon.

46. Click on the social link to change the link you want the icon to redirect to.

47. Click the url to change it.

48. Or if you want the icon to refer to something else than a weblink, click this dropdown button.

49. Click “Link to a Document…” if you want the icon to redirect to a specific item within the website.

50. Either search for it with the search bar, or scroll down to the desired document.

51. If you want the icon to redirect to a media item, click “Link to a Media item…”

52. Click the “Filter media elements” field to search for a specific media item or scroll down to look for it and select it. Or click on the button “Upload media” to upload your own media.

53. If you want to change the order of the existing social media icon, click this icon and drag it to the desired position.

54. If you want to add a new social media icon, click on the button “Add a new element in Social links”.

55. If you want to delete social media icon, click on the garbage icon.

56. Middle part of the footer
57. In this part you can edit the footer columns that contain footer links list (see footer links list guide) that are in the middle of the footer.

58. If you want to change the order of the existing link lists, click this icon and drag it to the desired position.

59. Click “Add a new element in Footer columns” to add a new link list.

60. Click “Select a link” to select a link list form the database.

61. Select one of the link lists.

62. If you want to delete one of the link lists, click on this garbage item.
